Sunday, March 24, 2013

Grease - You're the one that I want

In the schedule of a working dad, the opportunities for mucking around with your own bike are always few and far between. The new bottom bracket and chainset have been with me for weeks now, but circumstances and the freezing cold weather have meant that I have not fitted them.

The Octalink bottom bracket was chosen, partly because I wanted to fit a Tiagra chainset at the front. Tiagra as a component quality is the road bike equivalent of a rough and tumble mountain bike. The component group often being used on touring bikes and long range commuters.

Octalinks are Shimano's evolution of the square tapered bracket. Instead of a square taper for the crank arm, the crank arm is splined partly to give better purchase and transmission of the crank arm on to the bottom bracket. Partly to have a patented pattern that other manufacturers couldn't copy and so lock users into one make of component. It's an evolution that works as looking through the parts list it was getting harder and harder to find one that wasn't Octalink or ISIS based. Which in itself is silly becuase the square taper is effectively bomb proof and easier to manufacture. But I guess in a modern world looking for lightness and the next best thing everyone is happy to be tied into one manufacturer.

So the bottom bracket was an easy fit after some further cleaning and degreasing to make sure the threads were free of dirt. The it was just a case of grease, grease and more grease to the threads and slot on the splines. One thing though: more work. I have gone for a bigger number of teeth so I need to replace the chain (which is now too short), and the front mech will need re-aligning, and a new cable to cope with any additional pull as I have not left much play in the current one. I may also need to sort out the chainline which may differ, but I will check that later.


The chain has been replaced with a SRAM 9 speed, because after mucking around with all those pins on the Shimano I can't be bothered spending another £5 because the pins won't insert straight and break. The powerlink clip makes it much easier to work with and has the advantage of if I change any of the gear ratios I will be able to shorten quickly and easily without fuss.

Saturday, March 2, 2013

One Crank arm on my Wagon

Generally, I find that once I have completed a series off tasks designed to correct a fault everything starts to go swimmingly. The issue with the chainset on the Ridgeback Adventure 520SX had left me a little stumped. What do I replace it with? Do I stick with the three at the front or move to a two ring configuration. Do I keep the old bottom bracket which although not showing signs of wear is many miles old and will need replacing sooner or later? If I replace do I stick with the sealed cartridge bottom bracket or adopt the Octalink version for which more chainsets are available for 9 speed set ups?

I spent a lot of time kicking these ideas about and thinking I will need to get the bottom bracket off just to check the BB size when.....I found myself on a gentle training ride with my foot attached to the pedal but the pedal no longer attached to the crank arm. The cheap light aluminum arm that had come with the bike back in those oh so dark 1990's had finally worn away against the better tensile strength of my pedals. OK fine so now I have to replace the lot. Might as well clean it all up and start again.

But although I got the non-drive crankarm off easily using the crank puller the same couln't be said for the drive side. Years of use and grime has finally caught up and bit me on the butt. I should have paid attention and taken these off and cleaned them. It takes a lot of leverage and a large amount of penetrating oil (not a light oil like WD40 but a lube containing graphite) and some patience to finall be able to extract the drive side. This can go in the scrap metal recycling there is nothing that can be re-used here.

Now for the bottom bracket and no surprise here again it proves troublesome to remove the drive side, and this is all the time remembering that drive side threads on a bicycle are all left handed. In otherwords the reverse of conventional "righty tighty lefty loosey". Lots of cleaning fluid and degreaser needed to be used along with doses on penetratiing oil until finally the grit and grime are removed and the seals are broken. For good measure I applied a few light taps to break any metal on metal bonding. No idea if this works, but it did seem like a good idea just in case.


So now all is stripped out and the bottom bracket is undergoing a full degrease and clean ready to accept a new bottom bracket. I know the size, 68mm as suspected, but the decision now needs to be made as to which one?
So the last post was almost prophetic in its tone. More haste less speed. I finally had to drop into the granny ring (smallest front chainring) on the Adventure the other day. The result on a steep incline was to suddenly stop as the chain stuck and held fast on a cog. Ouch. It is funny but running the bike off the floor on a workstand there was a little stickiness which I took to just be stiff linkers that would work out overtime. Under real pedal tension it appears that this is more serious. Four cogs grip the chain by being too wide for the 9-speed chain. Perhaps a little more careful investigation at the start would have presented the embarrassment of falling off on the hill.

The question now becomes how to fix the problem.

Wednesday, November 28, 2012

More haste less speed

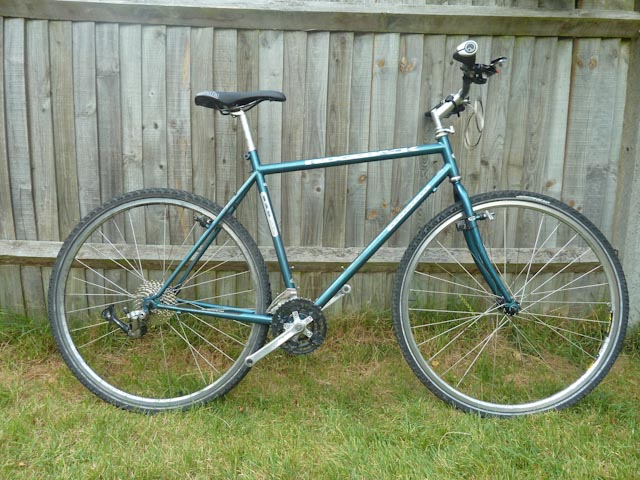
Finally, finished fitting the last components to the Adventure this week. Super I can ride on the road with sensible tyres. Armoured from the general road crud that buckles the wheels of racing bikes, and with enough traction that I won't feel like I'm about to slide off the bike at each corner. This is where I learn a valuable lesson - "more hase less speed" as the proverb goes.

More haste, because if I had completed this in a shorter time frame I would have not had one problem. Less speed would also have helped in keeping the costs down. At least it wasn't an expensive mistake. Fitting the rear cassette I was presented with a shrink wrapped set of cogs and in my eagerness to open the packaging all the cogs fell out of order. I was left with one small black O-ring lying on the floor. I stepped on it and snapped it. There was then the question as what to do with it, and how to replace it.

What to do with it, well it didn't work as a sprocket spacer any more as it just fell off in its traditional position of spacing 3rd to 4th. So I stuck it at the back of the cassette in the short term as a conventional spacer so that the whole thing sat on the rear hub. Then came the cabling up process and it took ages to get round to that so I forgot what I had done. More haste less speed.

It wasn't until I came to setting the gears up that the problem then became....well a problem. Shifting up and down was fine, but now I couldn't select 3rd with any reliability. The cog was there I could see it and I had sorted the index problem from a cable pinch. Why wouldn't it select?? Then I looked closely. Those cogs look a little close together. Hang on I'm missing a spacer!! Where is it? I remember it in the packaging. Hmmm I think I might have lost it. I turn out the toolbox where the spares sit and there is nothing that fits the bill. Do any of my old cassettes have this spacer. No of course not! I am upgrading away from the one piece design to a more interchangeable set. Where then do I buy one? Local bike shop or internet?

Well this kind of spacer is probably not something you would keep in stock at the bike shop, but it could save all the hassle of buying the wrong one. On the otherhand I can do a lot a research from the comfort of my own home and save the traipsing to the shop to find out that they don't have one or that I have to buy a complete cassette to replace it. So Internet it is then.

Wiggle, Chainreaction cycles, and Evans lots of spacers but sadly for adjusting the cassette to different wheel hubs. I am noticing here a big shift towards 10 speed and I think again the evolution of the drive train will make it increasingly difficult to find parts for those "affordable" bikes that most of us buy. So Google it and look at the images to see if I can find what I remember the sprocket spacer look like. Search term, hmm this is a tricky one as I don't know what it would be called. Try a combination of "shimano", "spacer" "cog" and "sprocket". Click. Scan.

There it is! Bonus it is on a cycle parts supplier website for a might £4. Could have been worse I suppose. Click order and wait.

A few days later it arrives through the post safely packaged in a cardboard protector to prevent it from bending and snapping in transit. It takes me a few more days to find the time to fit this and check the gear shifting. I remove the cassette quickly and easily (I'm getting better at this with practice). Slide on sprocket spacer in correct postion. Bugger! I can't get the lock ring on. I could have sworn that this was a 9-speed hub. Yes it is a 9-speed hub, I distinctly remember checking with Shimano.

I sit on the floor of the shed to have a little think. More haste, less speed. What if I take the whole cassette of and check the size I think. As I pull the cassette forward, plonk! A small black crescent of plastic falls to the floor. What's this? It looks uncannily like half a sprocket spacer. Then I remember how I had put it at the back for safe keeping. More haste, less speed.

Friday, November 9, 2012

Do not adjust your set


For some reason it has taken me ages to complete the last part of the set up on the Ridgeback, adding the chain. A fairly simple task, but vitally important as setting up the mechs and shifters really rest on the chain being there. What can I say but that work got in the way.

Adding the chain should have been a simple process. Measure the chain length required by wrapping it wound the large front and large rear cogs (no going though the rear Jocky wheel), add a link and this is your chain length. It is simpler for replacing as you can just measure against the original chain, although I do find that a bit rough round the edges if the old chain has stretched. So a simple process once measured you break off the unwanted links using a chain break tool (it punches the link pins out) and then join the chain. I did this previously with a SRAM chain and it was truly simple. This time though, the link pins were so stiff that the chain rivet extractor broke. It was a cheap tool, but the bit that broke was the lever and that is annoying. I popped over to the Uncle to complete the job and then popped back home to find that I needed the tool again to insert the chain pin into the Shimano chain.

Replacement chain rivet extractor ordered and delivered and down I sat for the 2 min job. The pin is a two part assembly. The first part is a guide and then the second the rivet that will hold the chain together. The first part can then be broken off. All  well and good until the first part breaks before the second part is in the chain. Several minutes and much swearing later it is clear that there is no way to insert the pin into the chain with out the first part attached as manufactured. Thankfully it is possible to order spares, which a week later allows me to have another go. I am soon down to my last pin, the broken remains of the previous four lie scattered around along with my curses. It does go in and I do have a completed chain. But at what cost? I am tempted to swear off Shimano chains forever.

So now I can set up the gears. Here I discover a problem I had not considered before. On the Adventure the gear cables run under the bottom bracket, and being a resourceful chap I have never used my flash workstand with this bike. So this is a first and after 30 minutes if trying to get the gears to change into the smallest cog I am left scratching my head. I eventually discover that the new shifter has only 8 gear clicks. But it was a 9 speed shifter!!! I am very confused. I check several times and yes only 8 clicks. I wander away in disgust and do something else for 10 minutes. Really it is no disaster I do have an 8 speed cog I could use.

When I come back to the bike I notice that the cable is looking a little slack. Odd, it should be under full tension. I go back to the bike and move the front shifter to full tension, and again a tiny bit of slack. Well that certainly explains why the shifting isn't working, but why? The answer arrives like a bolt out of the blue, the cable runs under the bike and the bottom bracket is sitting on the workstand. Even though the cable runs through a housing that should prevent the cables getting trapped it is clear that free movement is not happening. I take the bike off the stand and tighten the cable slack on the lowest tension settings and suddenly everything is working. Only now I can't fine tune the bike on the stand, so its back to hanging the bike on two broom handles and using two garden chairs to create a hanger. Perhaps it is time to invest in a professional workstand.


Wednesday, August 29, 2012

Why not all cable outers are the same.

I spent 10 free minutes yesterday routing the cables for the gears to the mechs.  As I did this I got to wonder why there are two different types of outer, or to be more accurate. "Can I use the cool groovy blue brake cable outer for my gears?"

I have long understood that the outers are made slightly differently, but have never really bothered to find out why. I went to my bibles of all things bicycle "Zinn" and "Sheldon" . To find that the construction of the gear cables is designed to prevent compression. Yep I'd worked that out by looking at how the sheath was designed. But the compression is to help with indexed gears work properly. Ah might explain why I don't remember having special cables outers for bikes when I was younger and you fiddled with the lever until the derailleur clicked in your chosen gear, (hopefully).

So to answer my original thought yes I could use the funky blue outer, but then the expensive (but a lot cheaper second hand) rapid fire shifters would not work. Needless to say I have used the SIS Shimano outers that I had already.

Monday, August 27, 2012

Wiring it all up


The bike is now loaded with most of the components that it needs, although I have to say I have not put the mechs in the correct positions. In fact I am not even sure what the correct postions for these are! I am sure a little reading and a lot of fiddling around will sort this out. The chain will have to wait until this is completed.

I have cabled up the brakes which was a comparatively simple job. On this bike the brakes are of the cantilever style, which to look at the forum were going out of style in favour of the better stopping power of V style brakes. I am pleased to see that the brakes have made a come back, mostly due to the style conscious fixie couriers who clearly prefer them for some reason.  Not quite an evolutionary dead yet.

Cabling the brakes was simple as the brakes have a fixed length of cable defined by the hanger to operate the brakes. The rest of the cable length is actually irrelevant. It doesn't really seem to change the stiffness of the brakes. This means you can get away with bigish loops of  cable in the housing. Which is exactly what I didn't do, and I am now regretting the rather measly amount of cable I gave myself for the front brake. It is not affecting performance but it does look slight inelegant. I'd go back and change it, but that would mean a new cable and I am loathe to buy more just to satisfy a little bit of artistic flare. It can be correct when the brakes need changing again.

Cursing and fumbling with a 10mm spanner and a 5mm Hex key I remember that there is a pay off for canti brakes. Each brake block is adjustable. Fantastic for getting the perfect fit, but then again each of the two pairs of brake blocks needs to hit the rims at exactly the same point in time. Time slows as I fiddle moving blocks back and forward, fingers cramping from holding spanners and pulling brake levers. Back is aching from leaning over the bike until the stopping power of the brakes can be applied cleanly and evenly. "Think of it as a pay off", I tell myself "in the wet weather when a car decides to stop suddenly or turn across you. Then the bike will stop in a straight line and not slew across the road."
"Or I could just not cycle in the rain!" I reply.

I am now left with a large amount of cable housing and some spare cable. The housing is fine, there is always a need for housing and it fits both brakes and and gear cables. But the cable is a different matter. You can't use it on the bike to replace cable so what can you use it for. I am sure there is some hidden purpose for which it could usefully be employed. But what?