I spent 10 free minutes yesterday routing the cables for the gears to the mechs. As I did this I got to wonder why there are two different types of outer, or to be more accurate. "Can I use the cool groovy blue brake cable outer for my gears?"
I have long understood that the outers are made slightly differently, but have never really bothered to find out why. I went to my bibles of all things bicycle "Zinn" and "Sheldon" . To find that the construction of the gear cables is designed to prevent compression. Yep I'd worked that out by looking at how the sheath was designed. But the compression is to help with indexed gears work properly. Ah might explain why I don't remember having special cables outers for bikes when I was younger and you fiddled with the lever until the derailleur clicked in your chosen gear, (hopefully).
So to answer my original thought yes I could use the funky blue outer, but then the expensive (but a lot cheaper second hand) rapid fire shifters would not work. Needless to say I have used the SIS Shimano outers that I had already.
Wednesday, August 29, 2012
Monday, August 27, 2012
Wiring it all up
I have cabled up the brakes which was a comparatively simple job. On this bike the brakes are of the cantilever style, which to look at the forum were going out of style in favour of the better stopping power of V style brakes. I am pleased to see that the brakes have made a come back, mostly due to the style conscious fixie couriers who clearly prefer them for some reason. Not quite an evolutionary dead yet.
 Cabling the brakes was simple as the brakes have a fixed length of cable defined by the hanger to operate the brakes. The rest of the cable length is actually irrelevant. It doesn't really seem to change the stiffness of the brakes. This means you can get away with bigish loops of cable in the housing. Which is exactly what I didn't do, and I am now regretting the rather measly amount of cable I gave myself for the front brake. It is not affecting performance but it does look slight inelegant. I'd go back and change it, but that would mean a new cable and I am loathe to buy more just to satisfy a little bit of artistic flare. It can be correct when the brakes need changing again.
Cursing and fumbling with a 10mm spanner and a 5mm Hex key I remember that there is a pay off for canti brakes. Each brake block is adjustable. Fantastic for getting the perfect fit, but then again each of the two pairs of brake blocks needs to hit the rims at exactly the same point in time. Time slows as I fiddle moving blocks back and forward, fingers cramping from holding spanners and pulling brake levers. Back is aching from leaning over the bike until the stopping power of the brakes can be applied cleanly and evenly. "Think of it as a pay off", I tell myself "in the wet weather when a car decides to stop suddenly or turn across you. Then the bike will stop in a straight line and not slew across the road."
"Or I could just not cycle in the rain!" I reply.
I am now left with a large amount of cable housing and some spare cable. The housing is fine, there is always a need for housing and it fits both brakes and and gear cables. But the cable is a different matter. You can't use it on the bike to replace cable so what can you use it for. I am sure there is some hidden purpose for which it could usefully be employed. But what?
Sunday, August 19, 2012
I am alive
Contrary to all other reports I am not dead - although clearly I could be. Yesterday I survived a bad day in the hills with two minor offs and some lung bursting climbing up very shallow inclines (yes I am not fit). The P3 ran a smooth as a button and I was looking forward to a post-ride low maintance session when my bike broke. I say broke, but say rather a ditzy driver tried to occupy the same space currently occupied by the bike and me on the way home.
It was not as if the driver had not seen me (bright yellow rucksack) as they stopped behind me at the roundabout. The first bump might have been excusable as a misjudgement. The second and the keep coming and sucking the bike under the car was worrying. Glad I was able to unclip, but I did fear that very soon I was going over the top of the car. Lucky for me the mighty P3 stopped the car - at the expense of the rear wheel and the mech hanger which are both bent beyond repair.
The driver was thankfully shaking and apologetic, but it does make you consider several things about cycling. Mountain biking may actually be safer than cycling on an urban road - yes there are large imovable objects and smaller gnarly ones trying to unseat you at every turn, but then have you seen the potholes and street furniture on our streets? There certainly isn't 1 tonne + of metal travelling at speeds in excess of 10 mph waiting to drive you into them. The incidents of serious of death or severe crippling amongst even the most foolhardy of the mountain biking community - downhillers get my vote - it a lot less than that of cyclist of the road.
Insurance is another thing that makes me think. Third party and personal injury insurance if you spend a significant amount of time on the road makes sense. But what about fully comp - my motorist has driven off promising to send a cheque for a replacement wheel. I had no pen or paper on me at the time so I couldn't take details of insurance. Clearly a smartphone when riding is going to be a must for recording accidents (even if it is the aftermath).
So to the next P3 Project - it looks like a new rear wheel. I am not so foolhardy as to try and rebuild one at this stage of discovery. A wheel jig and dishing tool are definitely out of my budget anyway. I will though have to work out what mech hanger is compatible and replace that. Fitting at least will be easy.
Friday, August 17, 2012
Stripped naked


The cassette was really the only issue for the strip down. I have a Shimano lock ring tool for removing the lock ring (obviously). It is not a particularly expensive one coming as it did as part of a Halford's basic maintance kit. It does work though as it was used to do the work on the cassette of the P3 (Cassettes and Remasters). This time though it would not budge and was in danger of stripping all the splines off the tool. In fact it has done enough damage that I am going to have to get a new one.
Well and truly beyond the shifting with my short arm ratchet spanner and my middle aged bulk, after soaking in GT85 and a tap or two with a hammer to break and magnetised bond. I was down to a blowtorch (I don't have one), a longer spanner (I don't have one) or an angle grinder (I don't have one). Rather than fork out more than £40 for one of the above I thought I will give a local bike shop a call and see if they will take on the job. Having not got anywhere positive with one "local" bike shop. I say local because as you know they are a significant drive from central Croydon. I tried the other in Beckenham - "yes" said Deen's Garage in Beckenham. Not only did they happily apply a longer lever to the problem they also didn't charge a workshop fee because it was a quick job.
They say it easier to destroy than create. Now is the time when I find out if this is true. A bike that has served as a faithful servant riding across the West country along the Bristol to Plymouth route and over Welsh hillsides, as well as recent commuting to and from Greenwich, is about to have a make over.
Wednesday, August 15, 2012
And so the Legacy begins
In the absence of any project bikes, and despite my recent experience with bits falling off the P3 frame (must buy torque wrench). I decided to start work on my hybrid bike. Over the past couple of months I have been assembling a series of spares to overhaul the quite frankly knackered shifters and the aging drivechain parts. The experience of changing gears has reached the top end of tempermental. Which is to say the occasional inconvenience of forgetting your house keys as opposed to the Alzheimer memory loss.
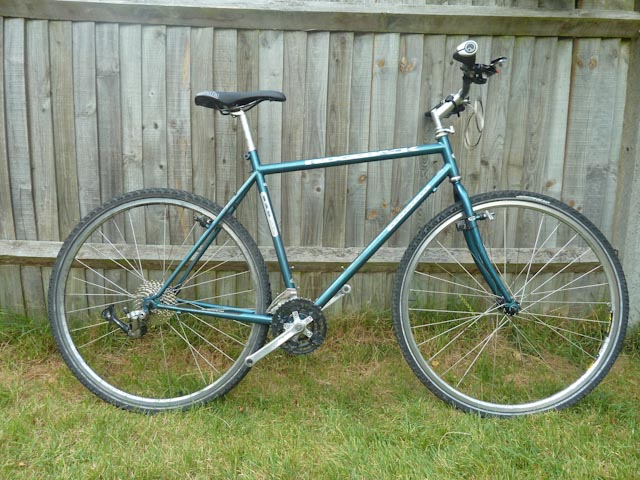
This bike is a Ridgeback Adventure SX120 - bought back in the early 90's and still going strong. When it was relatively new there was an inadvertant upgrade of wheels and hubs which looks to have been a very positive move as they run as smooth as the day they were fitted. It will also allow me to fit a 9 speed to them taking the range for the cassette from its lowly to 7 and adding a bit of low climbing gears for my tired old legs.
In my previous round of parts purchasing I had picked up some Shimano LX mechs and although I had planned to put these on an MTB build, I have decided that these should be the basis of the equipment change. Should these second hand parts fail then I have the option of buying a new part that will slot into the system. As this is to be a workhorse bike I wanted all the parts to be of a decent level of mechanical soundness. Most LX parts are relatively cheap and the shifters were easily located at a low price due to discontinuation of the items. A 9 speed chain and an HG50 cassette make up the drivechain parts.
The brake levers were also a little tatty and quite frankly as the levers themselves are plastic, I decided that replacement with some Avid Juicy 7's was a nice touch. Finally to complete the comfort rating I am going to add some Ergo grips and a new saddle (the old ones have been on from new, and I'm sure I deserve it).
My first task will be to strip down the bike and clean, I will leave the cantilevers on the bike. I'm not sure I want to go as far as a bare frame rebuild, but when I look at the bike I may change my mind.
Tuesday, August 14, 2012
G-Usain Bolt
In the last year there really has been no time for riding or for working on bikes. So apologies that everything has been very quiet. Having said that being back on the bike has shaken a few things loose. The first bolt to er.... bolt was a crank bolt on "I should Coco". I finished the section holding the crank on by force of will and foot. Now call me stupid, but I would have thought that with a simple machine like a bicycle the range of methods for attaching the crank arms to the bottom bracket were pretty standard. So stopping in Peaslake, I popped into the bike shop for a replacement bolt. Howard he say "No" - apparently no high tech enough for the bikes he sells. Fair enough.
 At home I start a search on the internet for a replacement. There on the page is a veritable smorgasborg of crank bolts, all with about information on size, fitting and suitablilty missing or phrased in some sophisiticated arcane manner that makes selection impossible.
One of the beauties of the internet is its accessibility and the range of information available - this time it fails miserably. My nearest bike shop is miles away (to the extent where I think opening one up would be a good business move, if I was incilined that way). Eventually, I make a trip in the right direction and pop in with the other bolt. It takes 10 mins of rooting in the spares draw, but eventually they find one that matches (visually) to what I need. I still have no idea what size, configuation the bolt is.
 The process of fitting a new crank bolt is simple - especially when you have put everything together from scratch. Everything is fantastic and I make the next ride some months later it has to be said with no bike failures. However, I don't follow the simple advice that I should clean down and check the bolts etc at the end of each ride. I forget that I have not tightened to precise torque settings and that a few things may have shaken loose from the last failure. So I am out riding solo across some trails and feeling goof about how the bike is handling in the summer sun when clank, clank, clank. Pulling up I discover the bashguard is hanging off to one side. A closer inspection reveals that 3 of 4 bolts that hold the chainring and the bashguard together have gone AWOL. Perhaps that should be LWOT (lost without tightening).
A familiar story on the internet - but here just a bewildering array of choices. A trip to a bike shop that deals in high end gear is unproductive in walking out with desired product, but helpful in learning about variations in chainring bolts and lengths. I am able to order parts and replace.
One of the beauties of the internet is its accessibility and the range of information available - this time it fails miserably. My nearest bike shop is miles away (to the extent where I think opening one up would be a good business move, if I was incilined that way). Eventually, I make a trip in the right direction and pop in with the other bolt. It takes 10 mins of rooting in the spares draw, but eventually they find one that matches (visually) to what I need. I still have no idea what size, configuation the bolt is.
A familiar story on the internet - but here just a bewildering array of choices. A trip to a bike shop that deals in high end gear is unproductive in walking out with desired product, but helpful in learning about variations in chainring bolts and lengths. I am able to order parts and replace.
Subscribe to:
Posts (Atom)