As I mentioned in my last post, I needed a quick release skewer for the rear wheel on the P3 project. Now clearly I could buy every length and type of rear skewer and experiment - evolutionary style. But quite frankly I don't have the resources or the time. So I went to God - well the nearest thing in bike mechanics and looked up the manufacturer's specifications for the LX freehub. Cheating I know but how else am I going to accelerate and evolve?
Looking at the specifications I began to realise that this was not a "normal" skewer. Not readily available off the shelf, and so quite tough to find. The original component replacement is pricey - Madison's have a one for £17 which is close to the most you can pay, and more than half the cost of the frame alone. So I pop down to my local bike store Bike+ here in Croydon. The thing about bike stores is that the good ones will give you advice and suggestions. So discussing the skewer problem, we develop the idea that 168 probably has a lot of spare capacity for even chunkier frames. With the P3 the frame doesn't have dropouts which are that wide, so a 152mm the longest available will probably work. I take away a pair (front and rear) for a tenner with the knowledge that I can return them if it doesn't work.
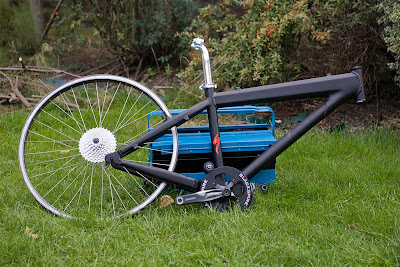
Home again and after a quick clean of the rims and hubs, which are still shedding some grey dust, time to test the theory. Fantastic, plenty of spare thread to fit to the skewer, so no danger of it coming off during a ride. Time to put the tyres on and then on to the forks.
Wednesday, September 29, 2010
Saturday, September 25, 2010
Kebabs!!
Sorry, I always think of kebabs when I think about skewers. It is a perennial habit, that come summer and the BBQ season then most of our food will be cooked outdoors on a skewer. Late night drinkies, usually, result in a trip for a Shishkebab and chilli sauces. All of which is a diversion from the main topic of the post of fixing your wheels to your bike.
As I have mentioned previously, the wheels I picked up on ebay are missing a few bits. Mostly something to fit the wheel to the frame. Now I have a couple of quick release skewers knocking around in the shed from cheap wheels that have bent or broken rims. However, these are all front wheels. So thinking that a skewer, is a skewer is a skewer, I attempted to use one on the rear wheel which is missing any visible means of fixing. The skewer came up short. To check I took the one off the "new" front wheel and the same problem. The skewer does not go all the way through the axle. Reasoning this through I worked out that it can't be a bolt on axle because that would be solid. So logic suggests that there must be such a thing as a rear axle QR skewer. A quick check and yes there is, but a huge array of different sizes. Time to do some research, I'm not rich so I can't afford to go buying different sizes and then selecting the one that fits.
Well this has lead me to think about Dollo's Law of Irreversibility - evolution tends to run in one direction. Having a bike hub with a quick release skewer means that it can never be held by a nut and of course vice versa. The designs are mutually exclusive. It is possible to "revert" to the more traditional nut based axle but in doing so I would need to make several changes to the hub that are not required for the axle but are for the process of conversion and allowing the wheel to work correctly. These changes are not impossible to complete, in this case bearings would need repacking, but things may never work as efficiently as they should.
Philosophically speaking then, why does evolution run like this. With bicycles as with much of engineering and design technology, it is about proprietory design, changes in materials, and cost effectiveness. I guess the surprising thing is that a similar set of imperitives exist in the evolutionary system. That is to say having something none of the others have, using a new resource and the energy cost required to effect the change. Does this mean that we can say both processes are effectively shaped by an underlying design principle?
Wednesday, September 22, 2010
Lost your widget?
The failure to get the crank arms off the bottom bracket, despite having two crank extraction tools has been preying on my mind. I couldn't work out why neither of them worked. So okay, the older coterless crank extractor that I have had since the year dot probably wouldn't work. But the newer one from a tool set? I couldn't quite believe it. Even looking on the internet didn't reveal any difference in the tools.
So out came the tool box and out came the bike frame again. Another try, and another failure. Then, as I returned the tool to the box, what do I spy? A widget, a magnetic widget none the less. A dim little memory of the end of the new crank extractor being tipped with this stirs in the back of my mind. Fitting the sliver of silver to the end widens the base of the crank extractor. This in turn means that the pin no longer slips through into the hollow bottom bracket, (not normal for taper and square bottom brackets). Bingo - all that was missing then was the widget! Better not lose it in the tool box again, or worse out of the box!
So out came the tool box and out came the bike frame again. Another try, and another failure. Then, as I returned the tool to the box, what do I spy? A widget, a magnetic widget none the less. A dim little memory of the end of the new crank extractor being tipped with this stirs in the back of my mind. Fitting the sliver of silver to the end widens the base of the crank extractor. This in turn means that the pin no longer slips through into the hollow bottom bracket, (not normal for taper and square bottom brackets). Bingo - all that was missing then was the widget! Better not lose it in the tool box again, or worse out of the box!
Monday, September 20, 2010
Bottoms revisited
Knock at the door today and a delivery man with two new tyres and an ISIS bottom bracket tool. So time to fit the bottom bracket to the bike. Sun is shining and all the chores are finished so I feel I can spend a little time working on something else.
Out on the patio with all the components laid out, I feel as if I can see how it fits together. What I can't see is where this bottom bracket tool comes in. There are no splines on a spindle this size for it to fit into. In fact it is rather too large for the job. Decide to check out the instruction manual it seems that my initial impression of not requiring a tool are correct. In fact it proves a doddle to fit with only a brief check of the Blackspire website to check on the orientation of the chainguard. But I may need a crank extractor sooner than I think. On placing the left crank arm to the bottom bracket the whole thing becomes stiff and unresponsive. Then the lockring begins to rotate. I remove the crank pin and try to take the crank off the bottom bracket, but no go, and you guessed none of my crank extraction tools will shift it. I actually manage to tighten the lockring up round the crank so it all looks neat and tidy. So I think a trip to the shops for the correct tool is required, but it will do for now. I'm also going to have to sort the bolting of the rear to the frame so I will clearly be making one trip to a cycle shop soon.
 Next will be hanging the rear derailleur and fitting the chain, but I think this is a job to complete at uncle riotous's garage where there is a workstand. Not only will it make it easier to complete the alignment, but it will save a bad back when we have finished. We will also fit the front forks from the old bike, so by the end we should be on the road.
Out on the patio with all the components laid out, I feel as if I can see how it fits together. What I can't see is where this bottom bracket tool comes in. There are no splines on a spindle this size for it to fit into. In fact it is rather too large for the job. Decide to check out the instruction manual it seems that my initial impression of not requiring a tool are correct. In fact it proves a doddle to fit with only a brief check of the Blackspire website to check on the orientation of the chainguard. But I may need a crank extractor sooner than I think. On placing the left crank arm to the bottom bracket the whole thing becomes stiff and unresponsive. Then the lockring begins to rotate. I remove the crank pin and try to take the crank off the bottom bracket, but no go, and you guessed none of my crank extraction tools will shift it. I actually manage to tighten the lockring up round the crank so it all looks neat and tidy. So I think a trip to the shops for the correct tool is required, but it will do for now. I'm also going to have to sort the bolting of the rear to the frame so I will clearly be making one trip to a cycle shop soon.

Friday, September 17, 2010
Not so worn anymore
Yipee - I have ordered some new tyres for the bike (Panaracer FR), you will remember that I said that the ones that came on the wheels were pretty worn. Well the more I looked at the them, the more I felt that the only place they would grip was if I was running at a forty five degree angle. So in the interests of being able to ride the bike straight out of the traps I decided to bite the bullet.
Of course the useful thing about this was that I was able to order an ISIS splined bottom bracket tool for £6 with free P&P. Just need to get my lockring wrench back from uncle Riotous and that little job can be completed as well. See already I am forced down an evolutionary path by the simple design choices that are available. It gives the manufacturers a niche in which to operate for a minimum cost, and now keeps me locked into an evolutionary pathway that will probably see me riding a sportive or triathalon bike in my old age.
Of course the useful thing about this was that I was able to order an ISIS splined bottom bracket tool for £6 with free P&P. Just need to get my lockring wrench back from uncle Riotous and that little job can be completed as well. See already I am forced down an evolutionary path by the simple design choices that are available. It gives the manufacturers a niche in which to operate for a minimum cost, and now keeps me locked into an evolutionary pathway that will probably see me riding a sportive or triathalon bike in my old age.
Tuesday, September 14, 2010
Cassettes and remasters
It has been a while since I have had a chance to do any work on the project bike and I have begun to get itchy to get on with it. Sadly, my youngest is now at school full time and the list of jobs that need doing round the house have got measurably longer. I often joke to the wife that since we have reversed roles it is her who is supposed to approach the DIY etc, but sadly she insists on baking cakes so what can a man do? It is true that the way to a man's heart is through his stomach. This then is the reason that I am back on the bikes.
So today have completed my allotted set of chores and kept house, I find I have half an hour spare. Time in which to change the cassette on the rear wheel. This consists of unlocking a nut on the rear wheel and swapping over all the parts without dropping any of them. The theory is that providing the cassette (that's the selection of gears at the back of the bike) and the freewheel (which connects them to the rear hub) are compatible it is a simple replacement job.
I start first with the removing the tyre on the wheel, not because it is necessary, but because I wish to check how true or straight the wheel runs on the axle. The wheels have been sold as no visible wobble, but it is probably best to check now and tweak the wheel into shape rather than find out when it is on the bike. While I am doing this I read the wheel size on the tyre 26x2.4 hmmm that could be problematic finding replacements. Note to self when buying secondhand rims check the tyre dimensions. It also starts to try and rain, I pray it will hold off long enough for me to finish the job outside.
 The lockring on the original 8 cogs is a little stiff but the with a little shimmy it opens easily enough and allows me to slide the original cassette of the freewheel. I put this in a bag for later. Maybe I can use them or sell them, either way they will need a clean. Which is what I set about doing to the freewheel. It is not particularly dirty, unlike the rime which is shedding black stuff all over me and the light coloured T-shirt I am wearing. However, I think that if I am building from the ground up it is best if the whole thing is as clean and dirt free as possible. Some degreaser and a good scrub and all is clean. Now to add the new cassette.
 The cassette is a SRAM PG970 9 speed, and it glows with a satin finish at me from within its packet. A packet that turns out to be all but impenetrable. Not wanting to score the metalwork with a knifeblade I battle the finally wrap until it begins to give up its precious cargo. At last, eyes shining, I remove the cassette unbroken, until near the end I find a wad of plastic bag inserted in the middle. Removing this proves to be the straw that breaks the camel's back and the last two cogs come loose with the lockring. Oh well not a disaster. I take the bulk of the cassette and start to fit it to the freewheel. It takes a couple of minutes to realise and locate the alignment spline which is smaller than the others. More a process of elimination here as I go round the set trying each one until it slides smoothly in. Now for the last two cogs, and here is where it really gets messy, because now they are separated from the rest, I really don't know which side is wheel side and which isn't. It takes a few moments of staring at how it will work for me to finally put it all together. Lockring on and tightened with the splined tool and the hole process is finished.
So there is another blind myth explored - if you create a sensible design with a finite series of combinations then the pathways are forced to accept one design over another. Oh and it starts raining after I have put the tools away. Time for the school run.
So today have completed my allotted set of chores and kept house, I find I have half an hour spare. Time in which to change the cassette on the rear wheel. This consists of unlocking a nut on the rear wheel and swapping over all the parts without dropping any of them. The theory is that providing the cassette (that's the selection of gears at the back of the bike) and the freewheel (which connects them to the rear hub) are compatible it is a simple replacement job.
I start first with the removing the tyre on the wheel, not because it is necessary, but because I wish to check how true or straight the wheel runs on the axle. The wheels have been sold as no visible wobble, but it is probably best to check now and tweak the wheel into shape rather than find out when it is on the bike. While I am doing this I read the wheel size on the tyre 26x2.4 hmmm that could be problematic finding replacements. Note to self when buying secondhand rims check the tyre dimensions. It also starts to try and rain, I pray it will hold off long enough for me to finish the job outside.


So there is another blind myth explored - if you create a sensible design with a finite series of combinations then the pathways are forced to accept one design over another. Oh and it starts raining after I have put the tools away. Time for the school run.
Wednesday, September 8, 2010
Bottoms!
Today I decided that I would tackle the bottom bracket fitting on the bike. Now I have to confess this is not entirely new territory for me as I have removed and replaced one before. Essentially, so long as you are careful and don't lose bits it is a slide out slide in job. However, you do need some specialist tools for the job one of which is a lockring spanner.
The first job is to clean the gunk and paint from the inside of the bottom bracket shell. This is a simple job of toothbrush, white spirit and a cloth to clean up. I don't need to worry about losing some of the paint at the exit as a) its a cosmetic cover up and b) no one is going to see it behind the lockring tool.
Now the real reason for choosing a spare hour and a half to do this is to check out the fitting of the Gigapipe bottom bracket (BB). This is new to me as all my experience is with old square taper brackets. The first thing I notice is that the usual method of locking into place is probably not going to work here. I think I need another tool for the toolbox. I have a bottom bracket tool, but it doesn't look as if it is designed for this type of BB. Curse the world of non standard international design. Shimano are the market leaders, but they do what they like, at least everyone else tries to work from a standard. Although I suspect they wouldn't if they could get away with it. Anyway, it is a Shimano BB tool not an ISIS one. Plus I discover as I look in the tool box there is no lockring tool either. Now where did I put that? Ah Uncle Riotous has it in his garage! Looks like this will have to wait until the tools are assembled in the same location.
So lesson, learnt I pack it all away again (Bottoms!). Time to drop a message to uncle about said tools. Not all wasted though as having looked at the set up I can see that it is really much easier than a cup and cone or square taper style BB. As an all in one there are no ball bearings or cartridges to chase around and apart from ensuring it is all greased and done up tight the job itself is as simple as pie.
 |
| Bottom bracket shell, TT Gigapipe and TT chainset with chain retention device |
Now the real reason for choosing a spare hour and a half to do this is to check out the fitting of the Gigapipe bottom bracket (BB). This is new to me as all my experience is with old square taper brackets. The first thing I notice is that the usual method of locking into place is probably not going to work here. I think I need another tool for the toolbox. I have a bottom bracket tool, but it doesn't look as if it is designed for this type of BB. Curse the world of non standard international design. Shimano are the market leaders, but they do what they like, at least everyone else tries to work from a standard. Although I suspect they wouldn't if they could get away with it. Anyway, it is a Shimano BB tool not an ISIS one. Plus I discover as I look in the tool box there is no lockring tool either. Now where did I put that? Ah Uncle Riotous has it in his garage! Looks like this will have to wait until the tools are assembled in the same location.
So lesson, learnt I pack it all away again (Bottoms!). Time to drop a message to uncle about said tools. Not all wasted though as having looked at the set up I can see that it is really much easier than a cup and cone or square taper style BB. As an all in one there are no ball bearings or cartridges to chase around and apart from ensuring it is all greased and done up tight the job itself is as simple as pie.
Subscribe to:
Posts (Atom)